
How to Set Up a Guppy Tank: A Beginner’s Practical Guide

To set up a guppy tank, choose a rectangular aquarium, add gentle filtration and an adjustable heater, treat the water, and establish the biological filter before buying fish. Plant the edges, leave swimming room through the middle, and check the water with a test kit. Clear water alone tells you very little.
My recommendation for a first setup is a 20-gallon long aquarium with a modest group of male guppies. It offers room for plants, easier cleaning, and more water to dilute waste than a small starter tank. A 10-gallon can work for a small group, but it leaves less room for mistakes.
Already brought the fish home? Skip to the troubleshooting section if they’re breathing rapidly, crowding the surface, or sitting with clamped fins. Buying another ornament can wait.
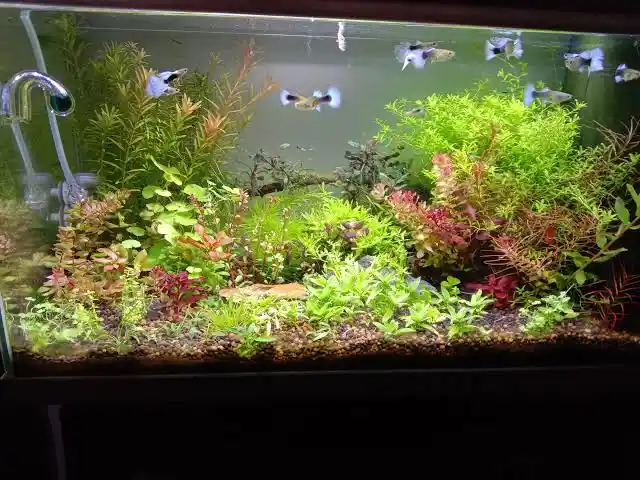
Decide What Kind of Guppy Tank You Want
Make the breeding decision before choosing decorations. It changes the space, equipment, and spare capacity you’ll need.
| Your plan | What it means for the setup |
| Male-only display | Avoids births if every fish is correctly sexed; still needs cover and a plan for persistent chasing |
| Mixed males and females | Needs a plan for fry, additional growing space, and homes for surplus fish |
| Female-only group | Can still produce fry if females previously lived with males |
For the example in this guide, I’d start with four adult males in a cycled 20-gallon long, without additional fish species. That is a conservative starting plan, not a maximum stocking formula. Watch the actual group: one fish repeatedly cornering another means the arrangement needs attention, even when the tank looks spacious.
If you choose a mixed group, a commonly recommended starting ratio is one male to two or three females. That may spread courtship attention, but it does not prevent breeding or guarantee peaceful behavior.
Check the anal fin rather than buying by color alone. Our male vs female guppy guide explains the difference.
Gather Equipment That Solves a Real Problem
You need a secure lid, suitable stand, filter, heater, thermometer, aquarium light, water conditioner, and testing supplies. Add a siphon, an aquarium-only bucket, a net, and an algae scraper suited to glass or acrylic.
For a sponge filter, remember the air pump, airline tubing, and correctly fitted check valve. The sponge does not run by itself, however convincingly the packaging photographs it underwater.
Buy the test kit before the decorative extras. The API Freshwater Master Test Kit on Amazon is one option for ammonia, nitrite, nitrate, and pH. It does not cover general hardness or carbonate hardness; those require separate tests.
A useful shopping rule is to ask: “What problem will this solve in my tank?” If the answer is unclear, leave it off the first shopping list.
Step 1: Position the Aquarium Where Maintenance Is Easy
Put the empty tank on a level stand designed for its filled weight, following the aquarium maker’s support instructions. Leave access for filter cleaning, the lid, and water-change equipment.
Avoid direct sunlight and locations beside radiators or air-conditioning outlets. Temperature swings and extra light create work you didn’t order.
Before filling, rehearse one water change with an empty bucket. Can you reach the bottom? Can you open the lid fully? Can you remove the filter without dragging the tank forward?
If not, move the empty aquarium now. A beautiful position that makes cleaning awkward usually becomes an awkward aquarium.
Keep electrical connections dry and form drip loops in the cords. Water should drip from the low point of a cord instead of following it toward an outlet.
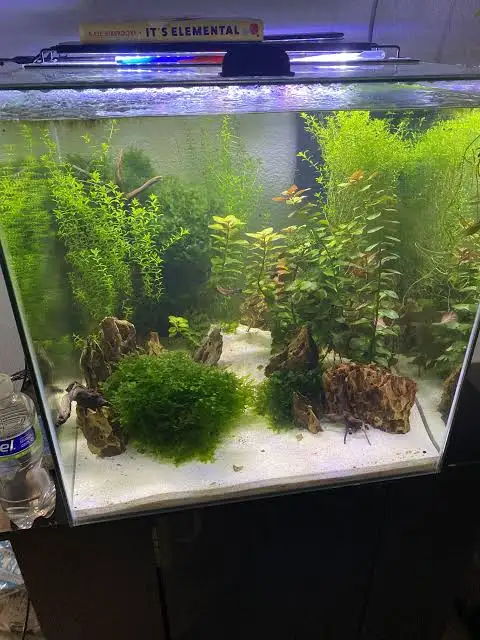
Step 2: Create Cover Without Blocking the Whole Tank
Use aquarium-safe sand or smooth gravel for a straightforward setup. Rinse inert substrate as instructed, without soap. Plant soils can have different preparation requirements, so read their labels rather than automatically rinsing everything.
A Practical Layout for a 20-Gallon Long
Arrange the tank around three jobs:
| Area | Put here | What it helps you do |
| Back corner | Sponge filter, with room to lift it out | Service the filter without uprooting the tank |
| Back and side edges | Plant groups and smooth cover | Give fish places to move out of one another’s view |
| Front and middle | Open swimming space and reachable substrate | Watch feeding and remove visible waste |
Leave more than one route around plant groups. A hiding place with one narrow entrance can become a trap when another fish guards it.
Try a simple maintenance test before adding water: move the siphon tube around the hardscape. If an entire corner is unreachable, change the layout while it’s easy.
Choose Plants by the Job You Need
Java fern and Anubias can attach to suitable wood or rock. Keep their thick rhizomes above the substrate. Moss provides fine cover, while guppy grass can create a looser planted area.
Don’t pack every available gap. Leave access to equipment and some clear surface water, especially if you use floating plants.
Our plants for guppies guide helps you choose plants for the tank you actually have. You don’t need to buy every plant on the list.
Step 3: Install Filtration and Heat, Then Test the Arrangement
A correctly sized sponge filter is a practical choice for this guppy-only setup. It provides a surface for beneficial bacteria and avoids the exposed intake found on many powered filters.
A hang-on-back filter can also work. Use an appropriate intake sponge if tiny fish could reach the intake, and adjust the outlet so it doesn’t blast across the entire aquarium.
Choose equipment for the tank volume, then judge its placement in use. Fish should have calmer areas to rest, while the water surface still moves. If guppies later spend all day struggling against the outlet, turn down or redirect the flow. Don’t switch the filter off overnight.
For many fancy guppies, 76–78°F, about 24–26°C, is a useful everyday temperature target.
Use an independent thermometer to check the water. A heater’s dial is a setting, not a measurement. Place the heater according to its instructions where water can circulate around it, and let it acclimate before powering it on as the manufacturer directs.
Check the temperature the next morning as well as during the warmest part of the day. A room that feels comfortable at lunchtime may cool considerably overnight.
Step 4: Prepare Water You Can Reproduce Every Week
Test your source water before trying to change it. Guppies generally suit mineral-rich water better than very soft water. Ask the seller about the conditions its fish are kept in, especially if your household water is unusual.
GH, or general hardness, describes dissolved minerals such as calcium and magnesium. KH, or carbonate hardness, helps indicate the water’s resistance to a falling pH. They are different measurements, and a pH reading cannot replace either one.
For a beginner, the most useful question is: “Can I prepare similar water every time I change it?” Choosing fish suited to your source water makes that routine easier than repeatedly adjusting the water chemistry.
Treat tap water with a conditioner that handles chlorine and chloramine. Seachem Prime on Amazon is one available option. Measure the dose using the bottle instructions; a small syringe makes small amounts easier to measure.
Water conditioner prepares tap water. It does not prove that your aquarium is cycled.
Avoid using plain distilled or reverse-osmosis water as the entire water supply without a suitable remineralizing plan. Also check whether your tap passes through a household ion-exchange softener. “Softened” household water is not the same as naturally soft aquarium water.
Step 5: Cycle the Tank Before the Fish Arrive
Cycling establishes bacteria that process ammonia from fish waste into nitrite, then nitrate. Ammonia and nitrite can harm fish; nitrate is managed through water changes, plant growth, and sensible stocking.
Start with a fishless cycle so guppies don’t have to live through the developing filter’s mistakes.
- Run the filter in the filled, conditioned aquarium.
- Use an aquarium fishless-cycling ammonia source and follow its measured dosing instructions. Do not use scented household cleaners.
- Test ammonia and nitrite, recording the readings and any additions.
- Follow the chosen protocol’s redosing instructions instead of adding more ammonia every time progress looks slow.
- Confirm that its specified test dose is processed with ammonia and nitrite returning to zero within 24 hours before stocking.
Product concentrations differ, so don’t borrow a drops-per-gallon dose from an unrelated bottle.
Make a conditioned, temperature-matched water change before fish arrive if nitrate has accumulated. Keep the filter running and follow the cycling protocol if stocking is delayed.
An empty tank showing zero ammonia has not necessarily passed the test. Without an ammonia source, there may have been nothing for the filter to process.
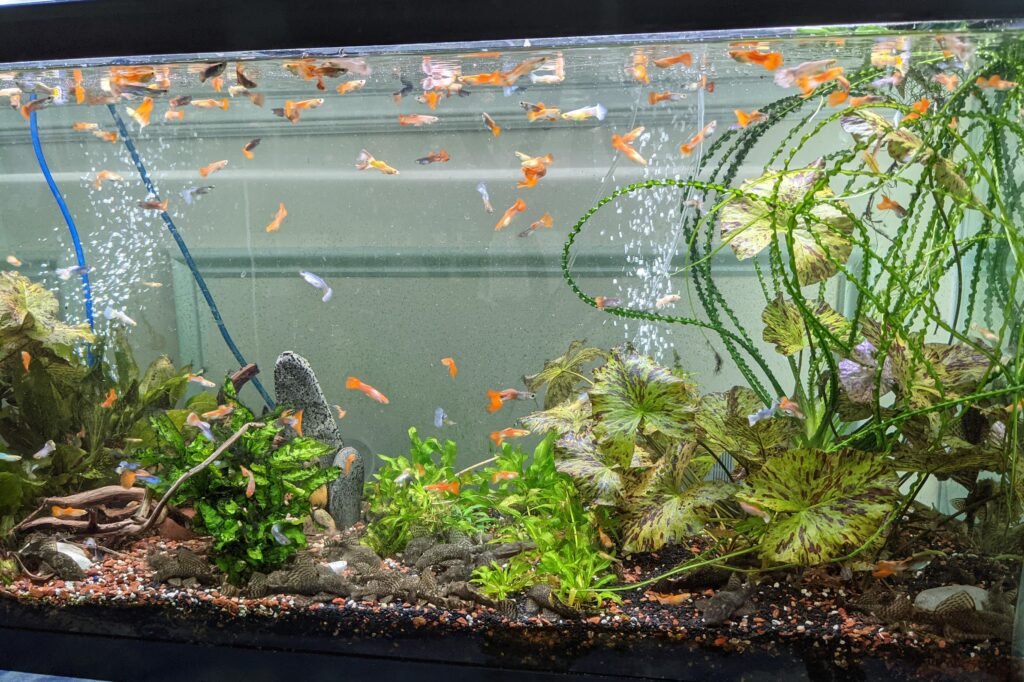
Step 6: Use a “Ready for Fish” Check
Don’t choose the arrival date first and hope the tank catches up.
| Check | Ready | Wait and fix |
| Biological filter | Completed the chosen cycling test | Only ran with water, or ammonia/nitrite remains |
| Temperature | Stable on an independent thermometer | Changes overnight or differs from the heater setting |
| Maintenance access | Filter and substrate are reachable | Cleaning requires dismantling the layout |
| Water supply | You can repeat the conditioning process | Hardness or source-water treatment is still unknown |
| Fish plan | Sexes checked and stocking plan decided | “We’ll see what happens” with mixed sexes |
This is also the moment to check the lid gaps and clear space for equipment. Those jobs become less relaxing once a bag of fish is waiting on the table.
Step 7: Bring Home the Guppies, Not an Entire Community
Choose fish that breathe comfortably, swim without struggling, and have open, intact fins. Ask to see them eat. Color is appealing, but it should not be the only selection test.
Use our types of guppies guide to compare appearances before visiting the shop. A beautiful tail still needs suitable water and a healthy fish attached to it.
Follow the supplier’s acclimation instructions, taking account of transport time and differences between the bag water and your aquarium. Locally purchased fish and fish shipped overnight should not automatically receive the same prolonged procedure.
Keep the lights subdued during introduction and avoid adding transport water where practical. If the aquarium already contains fish, quarantine new arrivals separately with suitable filtration and monitoring.
For this first setup, add only the planned guppy group. Save decisions about other species until you know how the tank and its residents behave.
Your First Week: Watch the Tank Before Reaching for Food
Check temperature, filter operation, and fish behavior every day. Test ammonia and nitrite daily during the first week after stocking and whenever fish behave unusually. Both should remain at zero.
I’d keep a simple note with four entries: temperature, ammonia, nitrite, and what the fish did at feeding time. “Three ate, one stayed behind the filter” is more useful than “fish seem okay.”
Offer small meals and remove leftovers. Don’t feed more simply because the guppies gather at the glass. They have already noticed where the food comes from.
For this lightly stocked example, start with a planned weekly partial water change of around 25%, then adjust its size and frequency to the readings and waste buildup. Test nitrate in both the aquarium and source water so you know what replacement water can achieve.
Clean filter media gently when it becomes clogged, using removed aquarium water or appropriately conditioned water. Avoid replacing all biological media together. The goal is restoring flow, not making every surface look factory-new.
Once the setup is settled, use the Guppy Care Guide for ongoing feeding, behavior, and routine care.
Troubleshooting a New Guppy Tank
| What you notice | Check first | What to do next |
| Rapid breathing or surface crowding | Ammonia, nitrite, temperature, and surface movement | Increase aeration; if ammonia or nitrite is detected, change part of the water with conditioned, temperature-matched water and retest |
| One guppy hides while the others look normal | Chasing and access to food | Watch quietly, improve visual cover, and separate a persistent aggressor if needed |
| Fish avoid the filter end | Outlet strength and swimming effort | Redirect or reduce the current while preserving filtration |
| White, cloudy water | Test readings and uneaten food | Remove waste, keep filtration running, and respond to the readings rather than treating cloudiness alone |
| Fry appear in a “female-only” tank | Whether females previously lived with males | Protect filter intakes and arrange suitable growing space and rehoming |
If several fish suddenly struggle, check their shared environment before assuming several separate diseases. For severe, worsening, or unexplained symptoms, seek help from an aquatic veterinarian.
The Guppy Diseases Guide can help you compare signs after those initial checks. Don’t choose medication from a single symptom.
What If the Fish Are Already in an Uncycled Tank?
Do not add a fishless-cycling ammonia dose. The fish already supply ammonia through their waste.
Keep filtration and aeration running. Test at least daily, feed lightly, and use conditioned, temperature-matched partial water changes as needed to control ammonia and nitrite. Retest after changes; a fixed weekly schedule is not enough when readings are unsafe.
If possible, ask a trusted aquarium shop about safe temporary housing or mature filter media from a healthy system. Used tank water alone does not provide the same established biological filtration.
Build a Tank You Can Keep Steady
Before buying the guppies, complete one practice water change, verify the cycle, and check the overnight temperature. If those three jobs go smoothly, you’ll bring the fish home to a working aquarium instead of a project with residents.
