Welcome to the colorful world of Dutch aquascaping! If you’re new to planted aquariums and looking for a style that combines beauty with structure, Dutch aquascaping might be perfect for you. This traditional approach to underwater gardening started in the Netherlands in the 1930s and has won the hearts of aquarium fans worldwide.
Unlike nature-inspired layouts that mimic wild underwater scenes, Dutch aquascapes focus on neat plant arrangements with clear patterns and stunning color contrasts. Think of it as an underwater flower garden!
In this guide, we’ll walk through everything you need to know to create your own Dutch-style aquarium. From basic techniques to plant choices, equipment needs, and step-by-step instructions, we’ve got you covered. Let’s get started!
What Makes Dutch Aquascaping Special?

Dutch aquascaping stands out from other styles in several key ways:
- Organized plant groups: Plants are arranged in clear sections rather than randomly scattered
- Strong focus on plants: Unlike other styles that use rocks and wood, Dutch tanks mainly showcase plants
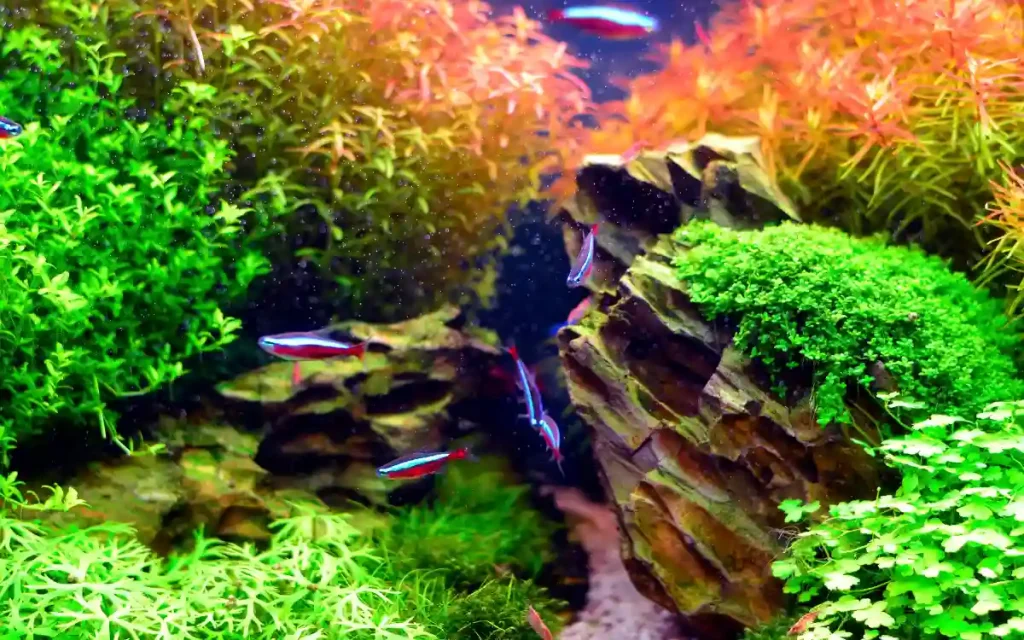
- Bold color contrasts: Different colored plants create visual interest and eye-catching patterns
- Neat, manicured look: Regular trimming keeps everything tidy and formal
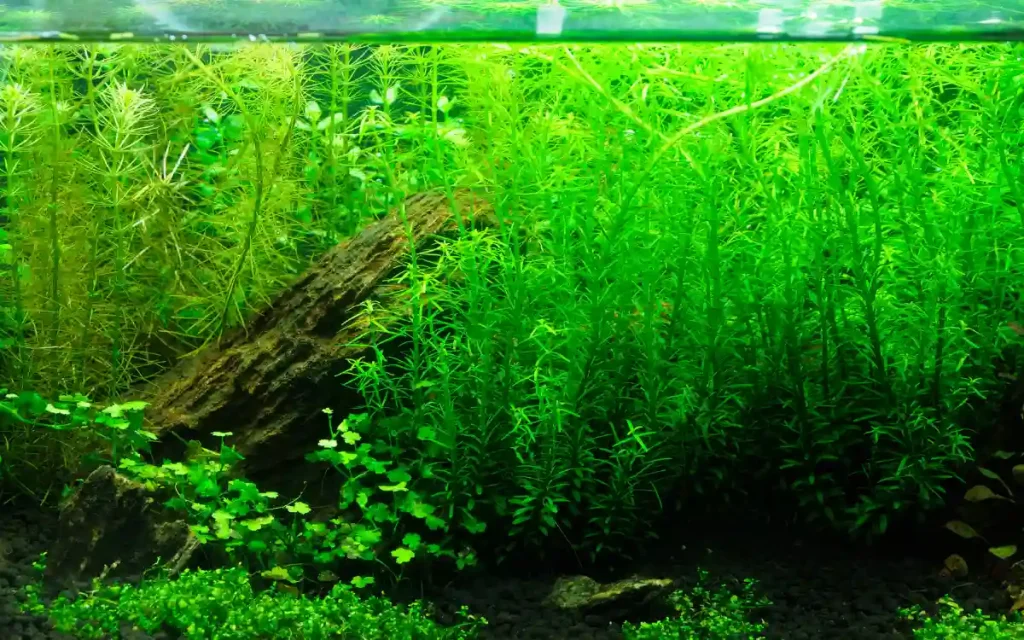
- Streets and rows: Open paths between plant groups (called “streets”) create depth and structure
- Minimal hardscape: Few rocks or driftwood pieces (if any)
- High plant density: Lots of different plant species packed together
Dutch aquascapes often follow the “rule of thirds” for balance and use plants of different heights, textures, and colors to create visual interest.
Getting Started: Equipment You’ll Need
Before jumping into creating your Dutch aquascape, make sure you have the right equipment:
| Equipment | Purpose | Recommendation for Beginners |
| Tank | Holds water and plants | 20-40 gallon tank (longer is better than taller) |
| Lighting | Provides energy for plant growth | Medium to high-intensity LED lights |
| Substrate | Anchors plants and provides nutrients | Nutrient-rich aquasoil or plant substrate |
| Filtration | Keeps water clean | Canister filter for larger tanks, HOB for smaller ones |
| CO2 system | Provides carbon for plant growth | Simple starter kit (for serious plant growth) |
| Fertilizers | Supply essential nutrients | All-in-one liquid fertilizer for beginners |
| Maintenance tools | For tank upkeep | Scissors, tweezers, algae scraper, water test kit |
Why good lighting matters: Dutch-style tanks need proper lighting since they focus so heavily on plant growth. Many plants used in Dutch aquascapes need medium to high light to thrive and show their best colors.
Choosing the Right Plants
Plant selection is the heart of Dutch aquascaping. Here’s what to look for when choosing plants:
Plant Types Based on Height
Background plants (8-20+ inches)
- Vallisneria
- Jungle Val
- Amazon Sword
- Rotala species
- Limnophila aquatica
Midground plants (4-8 inches)
- Cryptocoryne wendtii
- Hygrophila polysperma
- Ludwigia repens
- Bacopa caroliniana
- Alternanthera reineckii
Foreground plants (1-3 inches)
- Staurogyne repens
- Dwarf sagittaria
- Helanthium tenellum
- Marsilea hirsuta
- Glossostigma elatinoides
Plants for Color Contrast
What makes Dutch tanks stand out is their vibrant mix of colors. Consider including:
- Red/pink plants: Alternanthera reineckii, Ludwigia palustris ‘Red’, Rotala macrandra
- Green plants: Vallisneria, Microsorum pteropus, Bacopa caroliniana
- Yellow/gold plants: Cabomba aquatica ‘Golden’, Lysimachia nummularia ‘Aurea’
- Purple plants: Hygrophila pinnatifida, Nymphaea lotus ‘Red’
Beginner tip: Start with easier plants like Vallisneria, Amazon Sword, Cryptocoryne wendtii, Anubias, and Java Fern. As you gain experience, you can try more challenging species.
Step-by-Step Dutch Aquascaping Technique
Let’s break down how to create your Dutch aquascape in manageable steps:
1. Plan Your Layout
Before adding anything to your tank:
- Draw a simple sketch of your design
- Mark where different plant groups will go
- Plan your “streets” (open paths between plant groups)
- Consider the rule of thirds for balance
- Think about height progression (tallest in back, shortest in front)
2. Prepare Your Tank
- Install your equipment (filter, heater, lights)
- Add your substrate (2-3 inches deep, sloping higher at the back)
- Fill the tank partially with water
- Test and treat the water as needed
3. Plant in Groups
- Start with background plants, working forward
- Plant similar species in groups of at least 3-5 stems
- Leave clear “streets” between groups
- Create triangular or rectangular sections of plants
- Avoid mixing too many species in one area
4. Follow the Dutch Planting Rules
Traditional Dutch aquascaping follows several key rules:
- Use at least 12 different plant species
- No more than 70% of the tank should be one plant type
- Plant in groups, not individually
- Create clear “streets” for visual flow
- No two groups of the same color should touch
- Include a focal point to draw the eye
Beginner-friendly modification: Start with 6-8 plant species instead of 12+ to make maintenance easier while you learn.
5. Establishing Your Tank
- Fill the tank completely after planting
- Start your filter and heater
- Begin with 8-10 hours of light daily
- Add fertilizers according to package instructions
- If using CO2, start at 1 bubble per second and adjust as needed
- Be patient! It takes 2-3 months for a Dutch tank to fill in
Maintenance: Keeping Your Dutch Aquascape Beautiful
Dutch aquascapes need regular care to maintain their formal, garden-like appearance:
Weekly Tasks
- Test water parameters
- Change 25-30% of the water
- Add liquid fertilizers
- Trim fast-growing plants
- Remove any algae
- Clean glass
Monthly Tasks
- Deep trim all plant groups
- Reshape and redefine “streets”
- Thin out dense plant groups
- Check equipment
- Clean filter
Maintenance tip: Keep a set of dedicated aquascaping tools like long scissors, tweezers, and a rake for easier maintenance.
Common Challenges and Solutions
| Challenge | Cause | Solution |
| Algae growth | Too much light, excess nutrients | Reduce light hours, increase water changes |
| Leggy plants | Insufficient light | Upgrade lighting, trim and replant tops |
| Yellow leaves | Nutrient deficiency | Adjust fertilizer routine |
| Melting plants | Transition shock | Be patient, remove dead material |
| Cloudy water | Bacterial bloom, substrate disturbance | Water changes, improved filtration |
Inspiration: Dutch Aquascape Examples
Looking at successful Dutch aquascapes can help you understand the style better:
- Classic Dutch: Structured rows of stem plants with clear streets and minimal hardscape
- Modern Dutch: Traditional Dutch planting with some nature-style elements added
- Dutch-Iwagumi hybrid: Dutch plant selection with the clean lines of Iwagumi rock arrangements
Check online aquascaping forums, YouTube channels, and Instagram accounts for examples of beautiful Dutch tanks.
Choosing Fish for Dutch Aquascapes
While Dutch style focuses on plants, fish add movement and life. Good choices include:
- Schooling fish: Neon tetras, cardinal tetras, rasboras (stay in groups for visual impact)
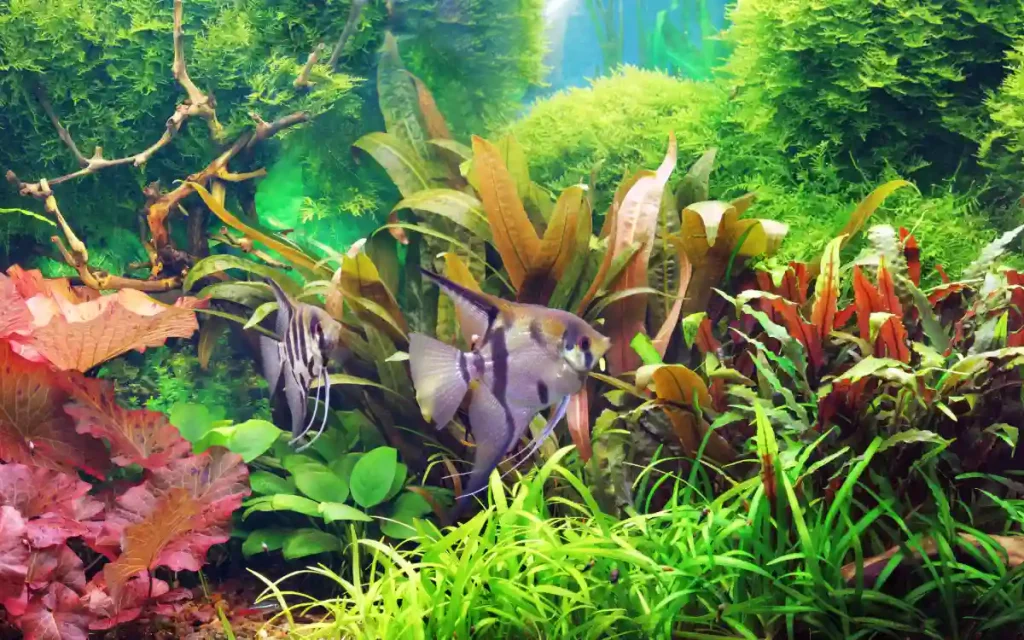
- Centerpiece fish: Gouramis, angelfish, or German blue rams (add focal interest)
- Bottom dwellers: Corydoras catfish or kuhli loaches (help clean the substrate)
- Algae eaters: Otocinclus catfish, nerite snails (help with maintenance)
Pick fish that won’t dig up or eat your plants. Avoid large cichlids, goldfish, and other plant-destroyers.
Final Tips for Success
- Start small: Begin with easier plants and fewer species
- Be patient: Dutch tanks take time to mature and fill in
- Keep learning: Join online communities to share experiences
- Take photos: Document your progress to see how far you’ve come
- Enjoy the process: Aquascaping should be fun and relaxing!
Related post: Aquarium Plants & Aquascaping: Styles, Care & Best Picks
Conclusion
Dutch aquascaping offers a structured, colorful approach to the underwater world that’s both beautiful and rewarding. While it requires some work to maintain, the results are worth the effort. By starting with the basics outlined in this guide and gradually building your skills, you’ll be creating stunning Dutch-style planted tanks in no time.
Remember that every aquascape is unique, and the most important thing is creating something you enjoy. Happy aquascaping!
FAQs
Q: Do I absolutely need CO2 for a Dutch aquascape?
A: While not 100% necessary for beginners, CO2 helps plants grow faster and healthier. You can start without it using easy plants, but adding CO2 later will open up more plant options.
Q: How many hours should I keep my lights on?
A: Start with 8 hours daily and adjust based on plant growth and algae levels. Too much light can cause algae problems.
Q: How often should I trim my plants?
A: Fast-growing stem plants might need weekly trimming, while slower plants might only need monthly attention. Watch your plants and trim as needed to maintain the neat appearance.
Q: Can I create a Dutch aquascape in a small tank?
A: Yes! While traditional Dutch aquascapes are often in larger tanks, you can create a mini version in tanks as small as 10 gallons by using fewer plant species and smaller varieties.
Q: What’s the difference between Dutch and Nature Aquarium styles?
A: Dutch style focuses on organized plant groups, streets, and color contrast with minimal hardscape. Nature style (popularized by Takashi Amano) uses rocks and driftwood to create natural-looking landscapes inspired by real outdoor scenes.