
12 Shrimp Tank Ideas That Are Easy to Recreate

A good shrimp tank doesn’t need to be large or packed with expensive equipment. A 5 to 10-gallon aquarium, gentle sponge filter, live plants, and a fully cycled tank are enough for most beginner-friendly dwarf shrimp.
The most important part isn’t the aquascape. It’s stable water.
Before adding shrimp, cycle the tank until ammonia and nitrite remain at zero. Add moss, wood, rocks, and plants that provide grazing surfaces. Shrimp spend most of their day picking at biofilm, which is the thin layer of microorganisms growing around an established aquarium.
The 12 ideas below are based on the pictured setups. You can copy the full design or borrow individual parts that fit your budget and available space.
What Does a Small Shrimp Tank Need?
Every shrimp tank needs filtration, stable water, hiding places, and enough surface area for biofilm to grow.
Here’s a simple starting point:
- Tank size: 5 gallons or larger
- Filter: Air-driven sponge filter
- Temperature: 68–76°F for most Neocaridina shrimp
- Ammonia: 0 ppm
- Nitrite: 0 ppm
- Nitrate: Preferably below 20 ppm
- Substrate: Sand, fine gravel, or aquarium soil
- Plants: Moss, Anubias, Java fern, floating plants, or easy stem plants
- Lighting: Six to eight hours daily
- Tank age: Fully cycled before shrimp are added
Shrimp can live in smaller containers, but water conditions change much faster in them. For beginners, five gallons is a far safer starting size than a one-gallon jar or tiny desktop bowl.
1. Beginner Low-Tech Planted Shrimp Tank
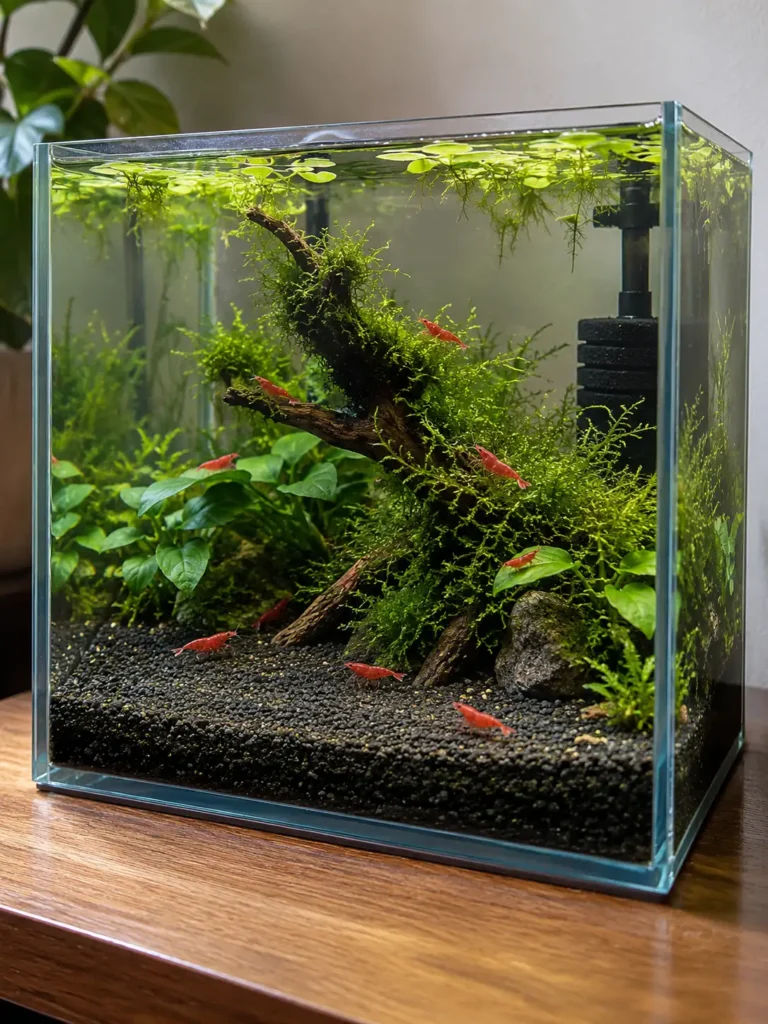
This setup uses Java moss, driftwood, Anubias, floating plants, and dark gravel. It’s one of the easiest designs to maintain because the plants don’t need injected carbon dioxide or intense lighting.
Dark substrate also makes red cherry shrimp easier to see. The shrimp may gradually develop deeper coloration when kept over a dark background.
How to recreate it
Start with a 5 or 10-gallon cube tank. Add one to two inches of dark fine gravel and position a branching piece of aquarium-safe driftwood near the center.
Tie Java moss loosely to the wood with cotton thread or attach it using aquarium-safe glue. Keep the moss layer thin enough for water to move through it.
Add Anubias around the base without burying its thick horizontal stem, called the rhizome. Finish with a few floating plants and place a sponge filter in a rear corner.
This setup works well for:
- Red cherry shrimp
- Orange Sakura shrimp
- Yellow Neocaridina shrimp
- Beginner shrimp keepers
- Low-tech planted tanks
Leave a small open area at the front for feeding. Otherwise, food disappears into the moss and becomes an all-you-can-eat buffet for snails.
2. Rocky Iwagumi-Inspired Shrimp Tank
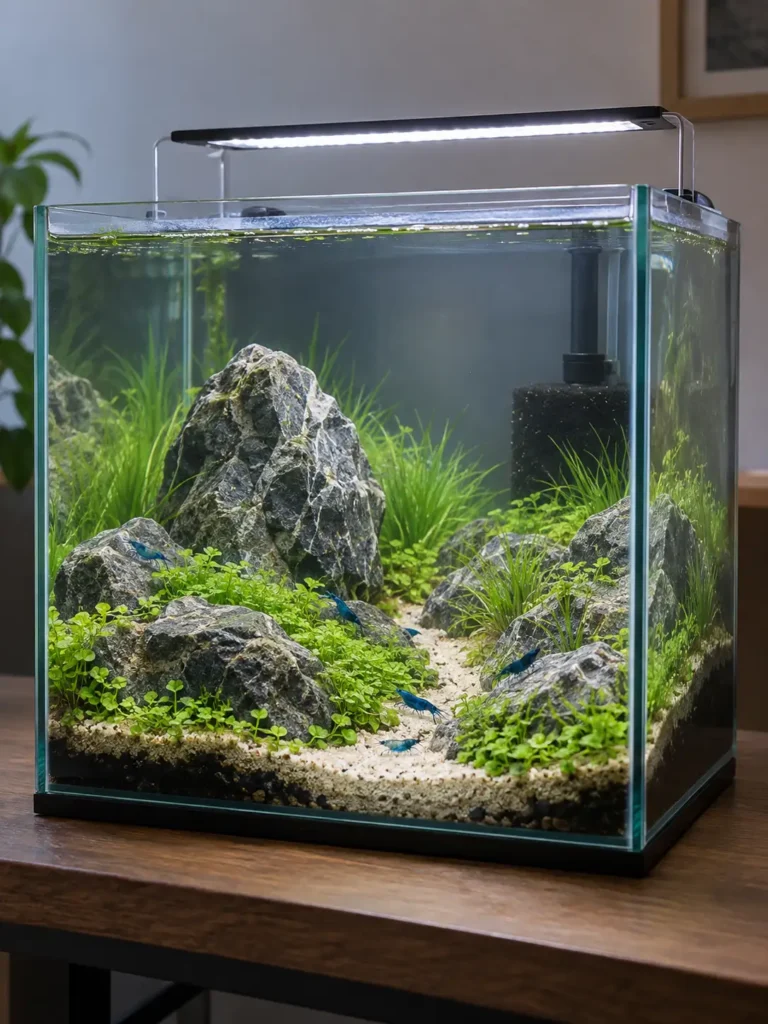
An Iwagumi-inspired aquarium uses carefully placed rocks to create a mountain-like scene. Traditional versions can be demanding, but this simpler design is manageable for beginners.
The sand path gives the tank depth, while low plants keep the rocks visible.
How to recreate it
Place a thin layer of aquarium soil across the bottom. Position one large rock slightly away from the center, then arrange smaller matching stones around it.
Use aquarium-safe rocks that won’t sharply change the water chemistry. Some limestone-based rocks raise hardness and pH, which may be useful or troublesome depending on your tap water.
Create a winding path with pale sand. Use dwarf hairgrass or a small carpeting plant along the edges.
You can use Monte Carlo, but it normally grows better with strong lighting and carbon dioxide. For an easier version, replace it with:
- Marsilea minuta
- Dwarf sagittaria
- Small clumps of Java moss
- Cryptocoryne parva
Blue Dream shrimp create a bold contrast against pale sand and grey rocks.
3. Moss Tree Shrimp Tank
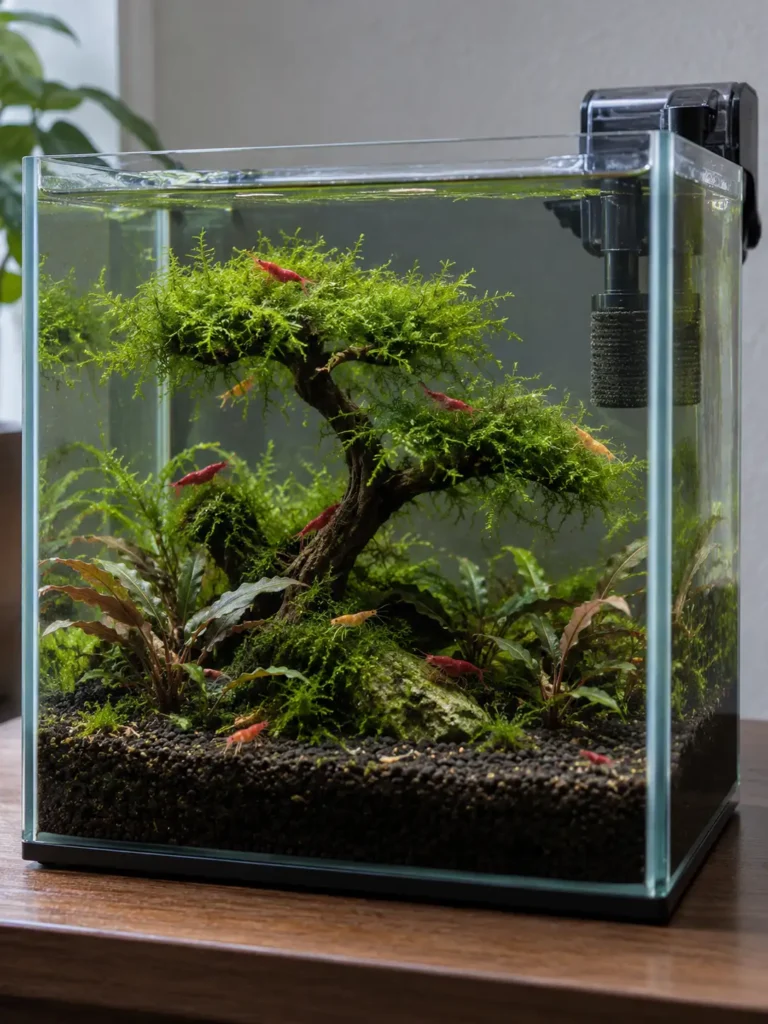
A moss tree turns one piece of branching driftwood into the main feature. It looks detailed, but the basic design is surprisingly simple.
The moss provides food, cover, and safe grazing areas for adult shrimp and shrimplets.
How to recreate it
Choose driftwood with several horizontal branches. Soak or boil the wood before adding it so it becomes waterlogged and releases less tannin.
Attach small amounts of Christmas moss, Java moss, or weeping moss to the ends of the branches. Don’t wrap huge clumps around the wood. Thick moss can trap waste and block light from reaching the lower growth.
Plant Cryptocoryne around the base to hide attachment points and make the “tree” look rooted in the substrate.
Trim the moss every few weeks. Use an aquarium net to catch the loose pieces before they spread everywhere. Moss has a talent for appearing in parts of the tank where nobody invited it.
4. Minimal Desktop Nano Shrimp Tank
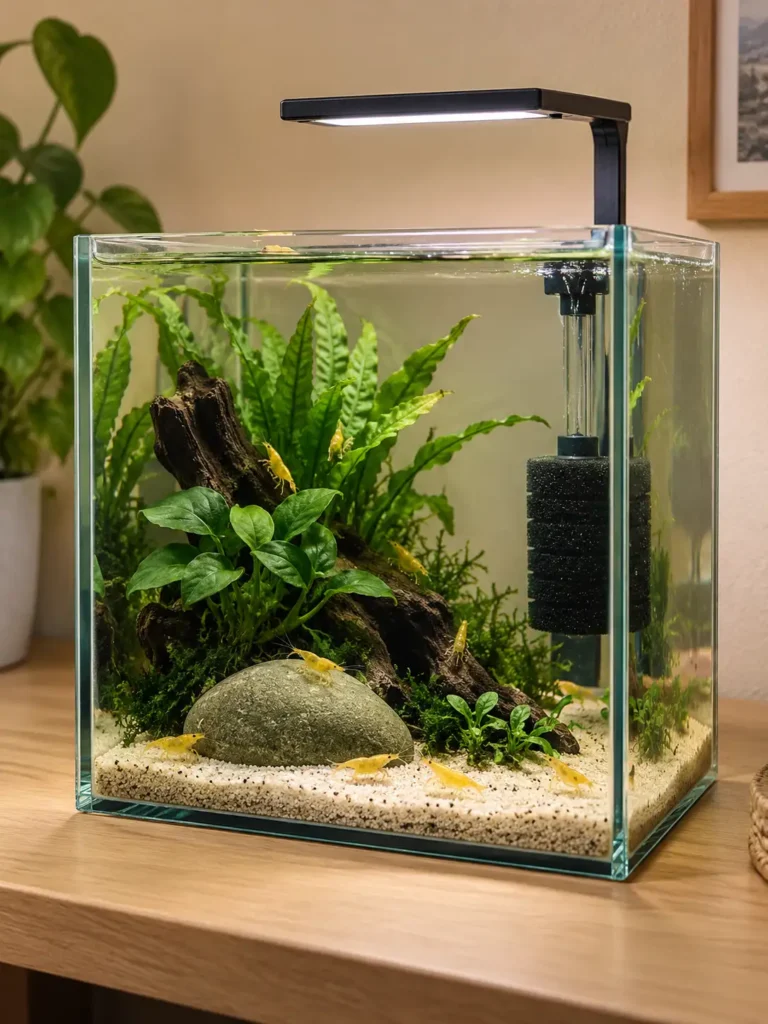
A desktop shrimp tank works best when the layout stays simple. One piece of wood, a smooth rock, and several slow-growing plants can make a small aquarium feel finished without crowding it.
A 5-gallon tank is the practical minimum I’d recommend for this design.
How to recreate it
Add a shallow layer of pale sand. Position one smooth stone toward the front and place a small piece of driftwood behind it.
Attach Anubias and Java fern to the wood. Both plants grow slowly and don’t need nutrient-rich substrate.
Install a small sponge filter and use a low-output LED light. Keep the light on for six hours initially. You can slowly raise the duration if the plants need more light and algae stays controlled.
This layout suits yellow shrimp because they show clearly against green leaves and pale sand.
Never put a filled aquarium on a weak desk. A 5-gallon setup can weigh more than 50 pounds once you include water, glass, rocks, and substrate.
5. Shrimp Breeding Tank With Dense Moss
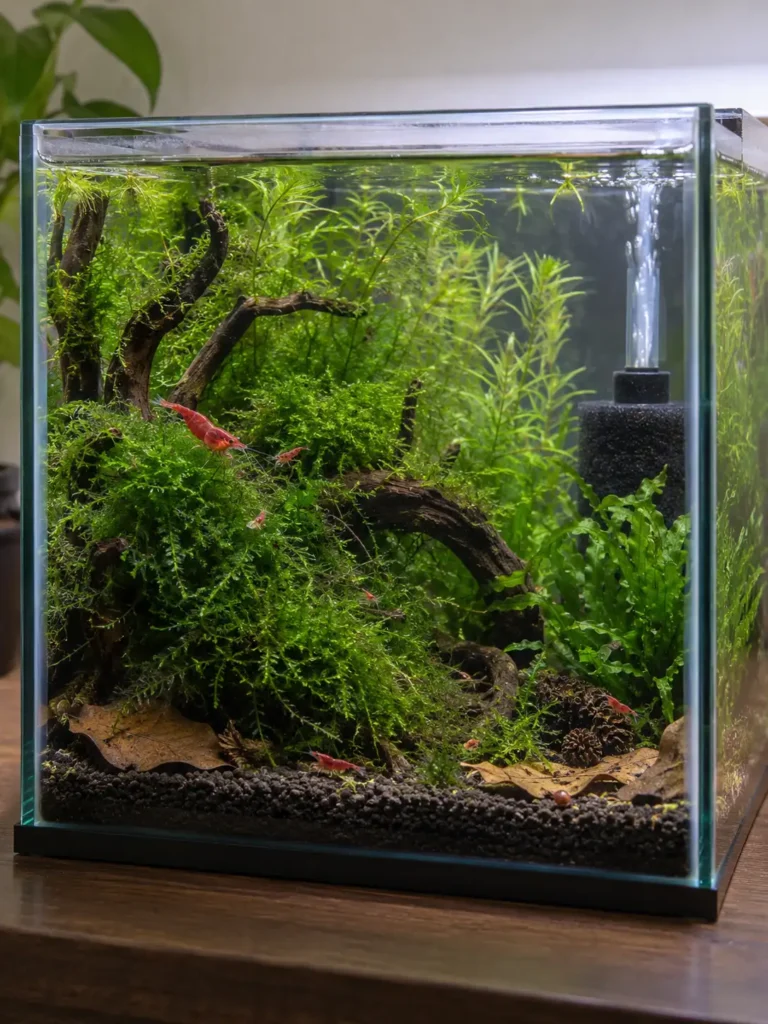
A breeding tank should favor shrimp survival over perfect symmetry. Dense moss and fine-leaved plants give newly hatched shrimp somewhere to hide and graze.
Baby shrimp are tiny. If you stare into the tank for ten minutes and see nothing, don’t panic. They’re probably wedged inside the moss eating biofilm.
How to recreate it
Cover part of the substrate with a loose mound of Java moss or Subwassertang. Add guppy grass or hornwort toward the back.
Place a small piece of aged driftwood in the center. Add one or two dried Indian almond leaves after preparing them for aquarium use. As the leaves soften, microorganisms grow across their surfaces.
Use an air-driven sponge filter. Avoid an uncovered hang-on-back filter intake because it may pull in newly hatched shrimp.
For a productive breeding setup:
- Keep only one Neocaridina color variety
- Maintain stable water parameters
- Avoid fish tank mates
- Feed small portions
- Leave some algae and biofilm
- Remove uneaten food before it spoils
Mixing several Neocaridina colors may eventually produce dull or wild-type offspring. Keep each color in a separate tank if maintaining strong coloration matters to you.
6. Blackwater-Style Shrimp Tank
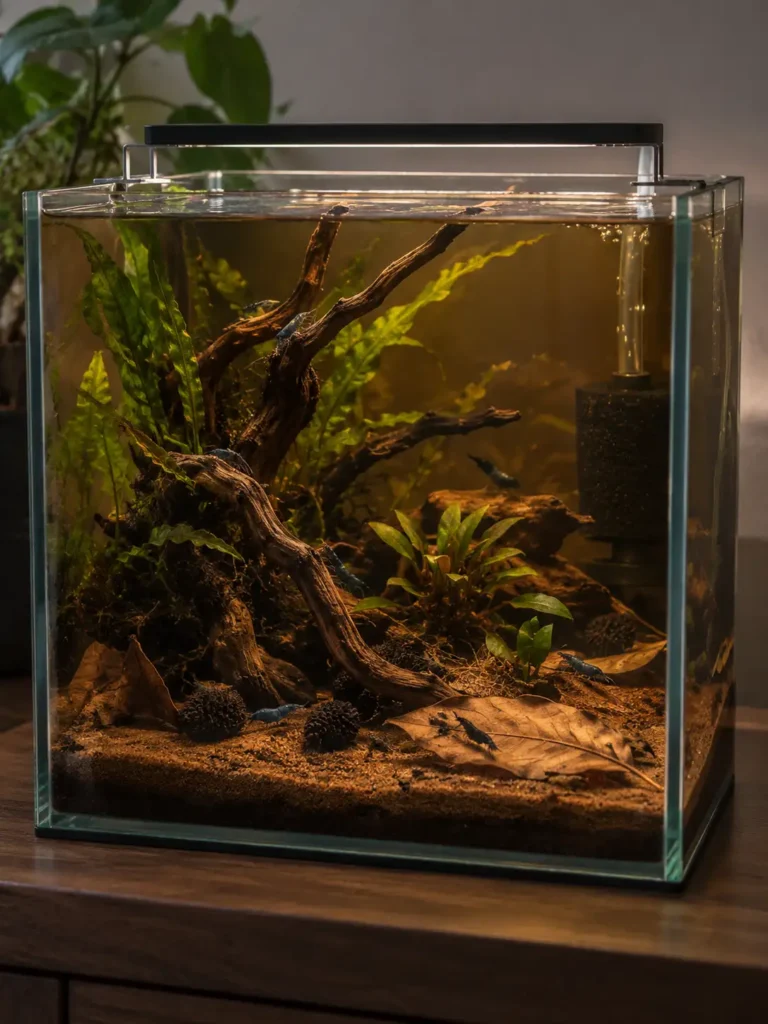
This design uses driftwood, dried leaves, and warm amber water to copy the appearance of a forest stream.
The brown color comes from tannins released by natural materials. Tannins aren’t dirt, although the tank may look like someone accidentally poured tea into it.
How to recreate it
Use fine brown sand and arrange twisted driftwood across the middle. Add Java fern and Cryptocoryne in shaded areas.
Place a small number of aquarium-safe dried leaves on the substrate. Indian almond, oak, and beech leaves are common choices when collected and prepared safely.
Introduce leaves gradually. A large amount of decaying material can affect water conditions, especially in a small aquarium.
Monitor the pH and hardness. Neocaridina shrimp generally need some dissolved minerals for healthy molts, so don’t try to create extremely soft, acidic water just for the blackwater appearance.
Dark blue or bright yellow shrimp are easier to spot in this setup than brown or black varieties.
7. Colorful Dutch-Style Planted Shrimp Tank
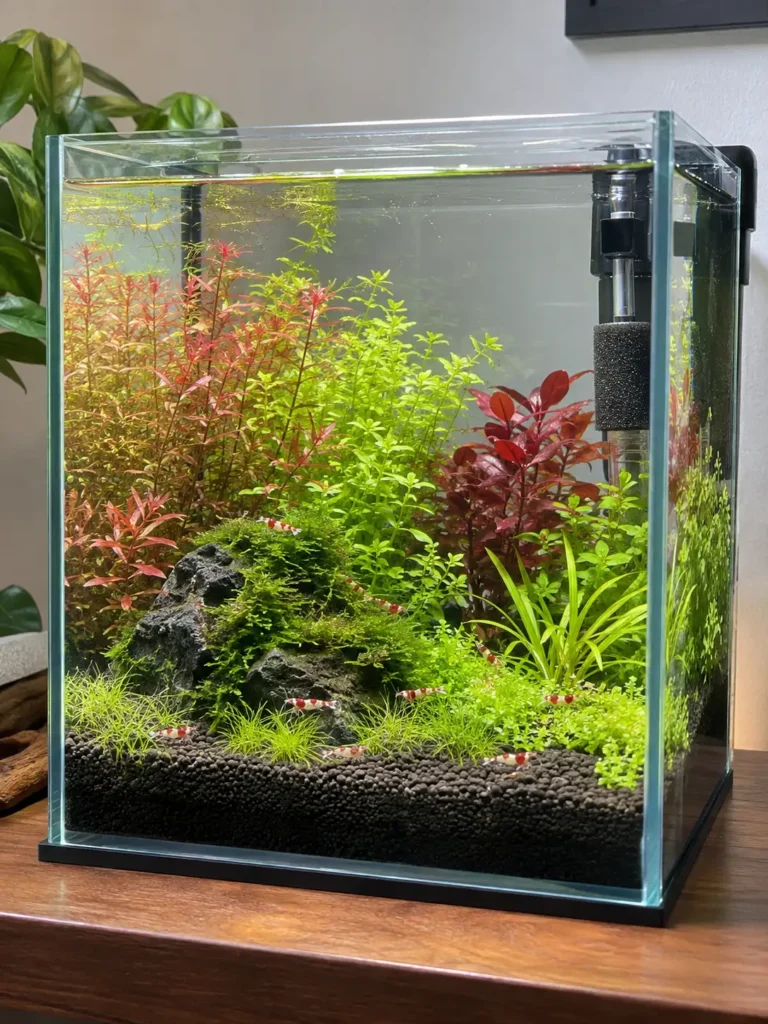
This planted design uses groups of green and red plants to create color without artificial ornaments.
It’s more demanding than a moss-and-Anubias tank. Stem plants need regular trimming, balanced nutrients, and enough light to hold their color.
How to recreate it
Use aquarium soil or fine gravel with root tabs. Plant taller stems along the back and keep shorter plants near the front.
Good plant options include:
- Rotala rotundifolia
- Pearl weed
- Dwarf sagittaria
- Ludwigia repens
- Cryptocoryne species
Plant each type in a separate group rather than mixing every stem together. This gives the tank an organized appearance and makes trimming easier.
Cover the filter intake with a fine pre-filter sponge. Shrimp will graze on it, and babies won’t be pulled into the filter.
Start with six hours of light. Long lighting periods often produce algae before the plants become established.
8. Budget-Friendly Shrimp Tank
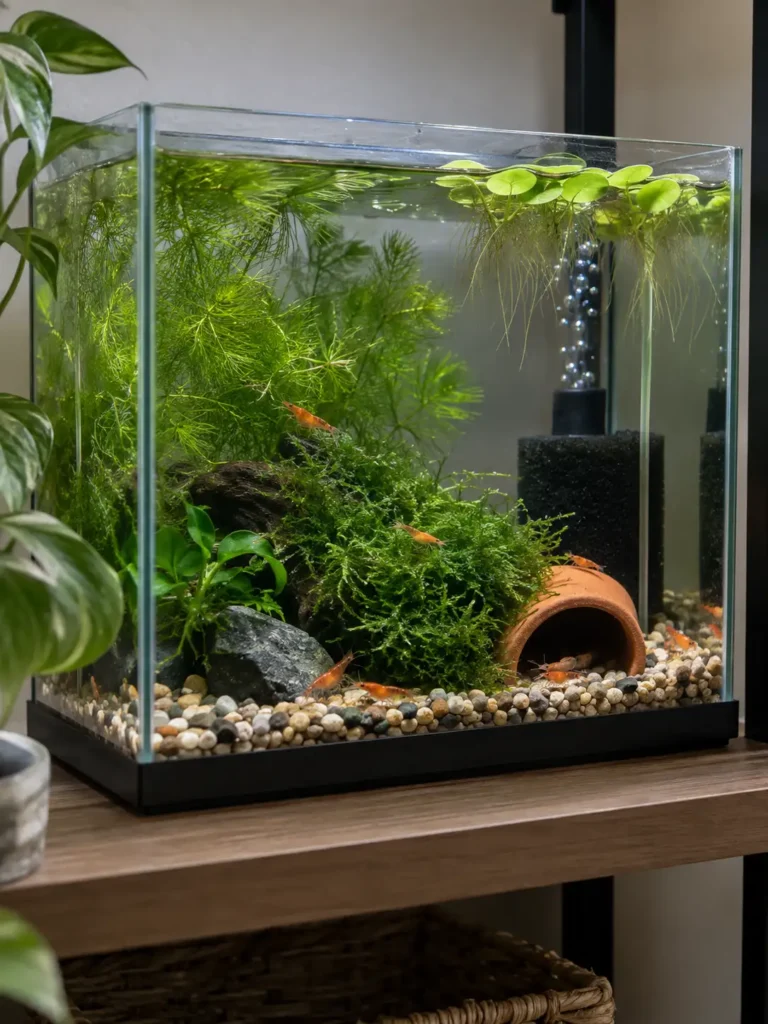
You don’t need premium aquarium soil, rare plants, or expensive decorative rocks to create a healthy shrimp tank.
This design uses gravel, a terracotta cave, moss, floating plants, and a simple sponge filter. Every part has a purpose.
How to recreate it
Choose a standard 5-gallon rectangular aquarium. Add rinsed inert gravel and one new, unglazed terracotta pot or shrimp cave.
Avoid painted or glazed pottery unless the manufacturer confirms that it’s aquarium-safe. Smooth any sharp edges before placing it in the tank.
Add Java moss beside the cave and place hornwort or guppy grass toward the back. Floating frogbit can soften bright light and absorb nutrients from the water.
Keep some open gravel at the front so you can see leftover food and remove it with a small siphon.
The basic equipment list is short:
- Five-gallon aquarium
- Sponge filter and air pump
- Adjustable aquarium light
- Gravel or sand
- Easy live plants
- Aquarium water conditioner
- Liquid water test kit
A heater may not be necessary if the room remains within the shrimp’s safe temperature range. Stability matters more than chasing one exact number.
9. Mountain Stream Shrimp Aquascape
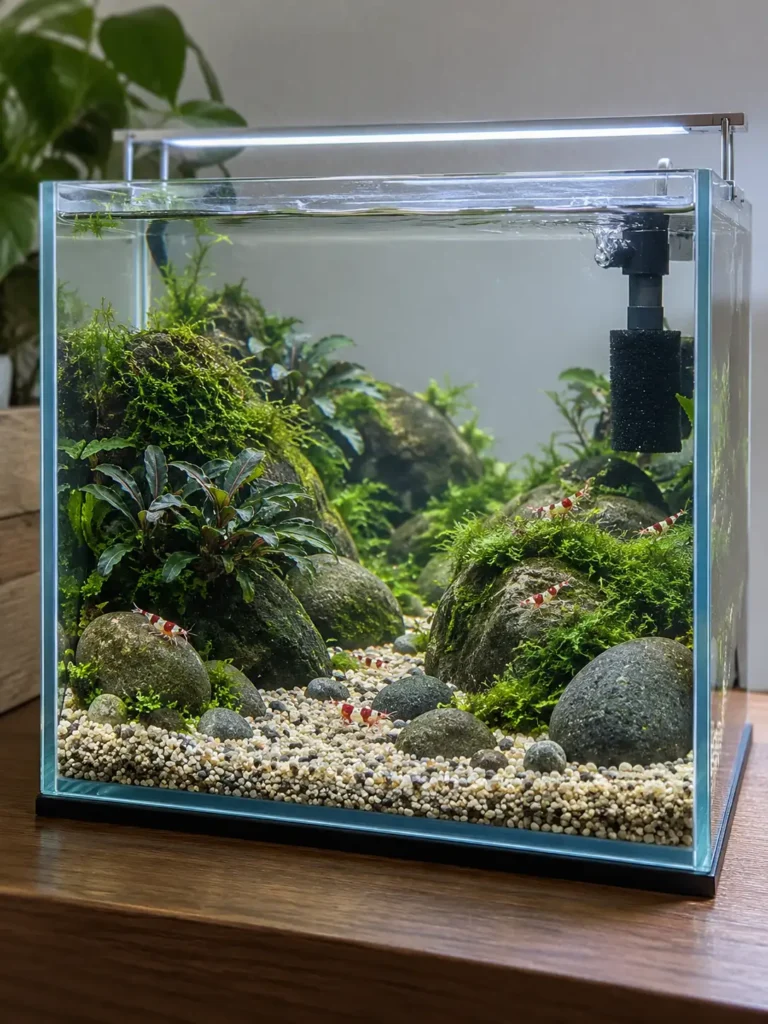
Rounded stones, fine gravel, and a narrow central path make this tank resemble a small mountain stream.
The rocks add a large grazing surface. Once the aquarium matures, shrimp will search every crack for algae and microorganisms.
How to recreate it
Add fine light gravel and arrange several rounded river stones on both sides. Keep a narrow valley through the center.
Never collect unknown rocks and place them directly into the aquarium. They may contain pollutants or change the water’s mineral content. Aquarium-store stones are the safer choice.
Attach Bucephalandra or small pieces of moss to several rocks. Keep most of the foreground open so the stone arrangement remains visible.
Crystal Red shrimp suit this design visually, but they’re Caridina shrimp and generally need tighter control of temperature, pH, GH, KH, and total dissolved solids. Beginners with ordinary tap water may find Neocaridina easier.
10. Jungle Shrimp Tank With Feeding Area
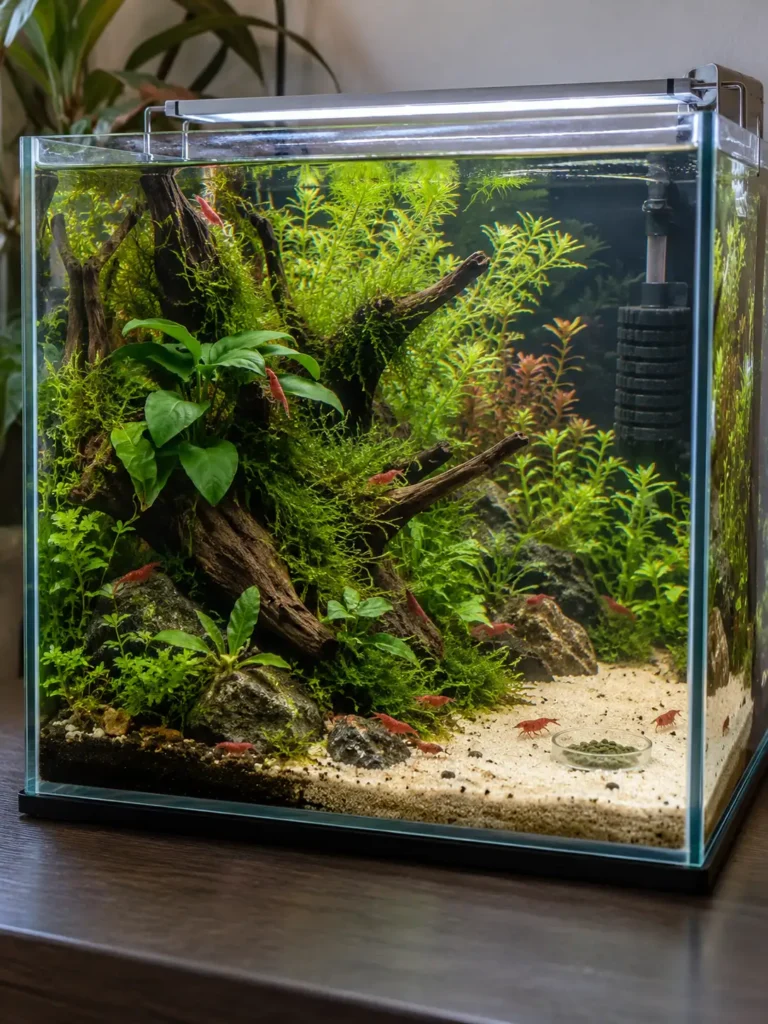
This design places dense plants and driftwood on one side while leaving an open feeding space on the other.
It offers the best of both worlds: plenty of cover for shrimp and easy access for cleaning.
How to recreate it
Place branching driftwood toward the left or rear side of the tank. Add Java moss and Anubias directly to the wood.
Plant water sprite or another fast-growing plant behind it. Keep the opposite side covered with pale sand.
Set a small glass feeding dish on the open sand. The dish prevents powdered and pellet food from falling deep into the substrate.
A feeding dish also makes it easy to see whether you’re feeding too much. If food remains after two or three hours, remove it and offer less next time.
11. Vertical Planted Jar Shrimp Tank
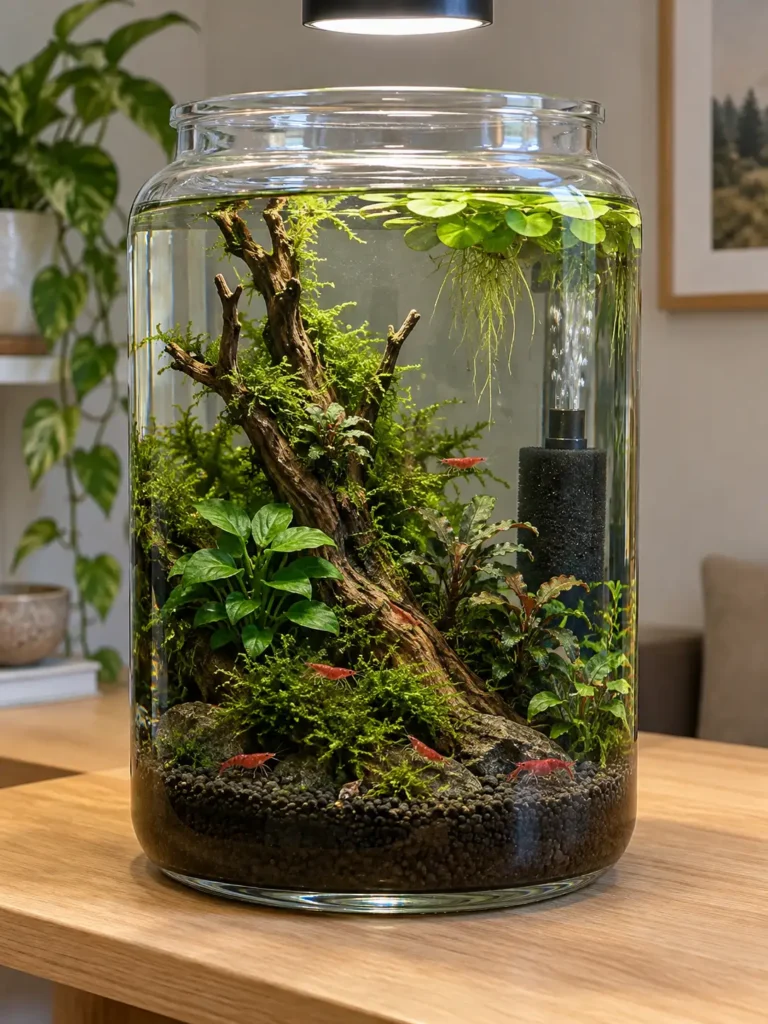
A tall jar creates room for upright driftwood and plants that grow at different heights. It’s an attractive choice for a narrow table, but the container must be large enough to filter, clean, and maintain properly.
Use a wide, open jar holding around five gallons. Tiny sealed jars aren’t suitable long-term shrimp homes.
How to recreate it
Choose a strong glass jar with a broad base and a wide opening. Avoid containers with thin glass or narrow necks.
Add one to two inches of dark fine gravel. Position a slim piece of branching driftwood vertically, making sure it cannot tip against the glass.
Attach Java moss, Anubias nana petite, or Bucephalandra at different heights. Add frogbit or Salvinia at the surface, but remove excess plants before they completely block the light.
A slim sponge filter can sit behind the wood. Leave room above it so bubbles can reach the surface freely.
Vertical containers can have less surface area than rectangular tanks. This makes surface movement and gas exchange especially important. Don’t seal the top, and don’t fill the jar with so many plants that water can’t circulate.
12. Wide Glass Bowl Shrimp Tank
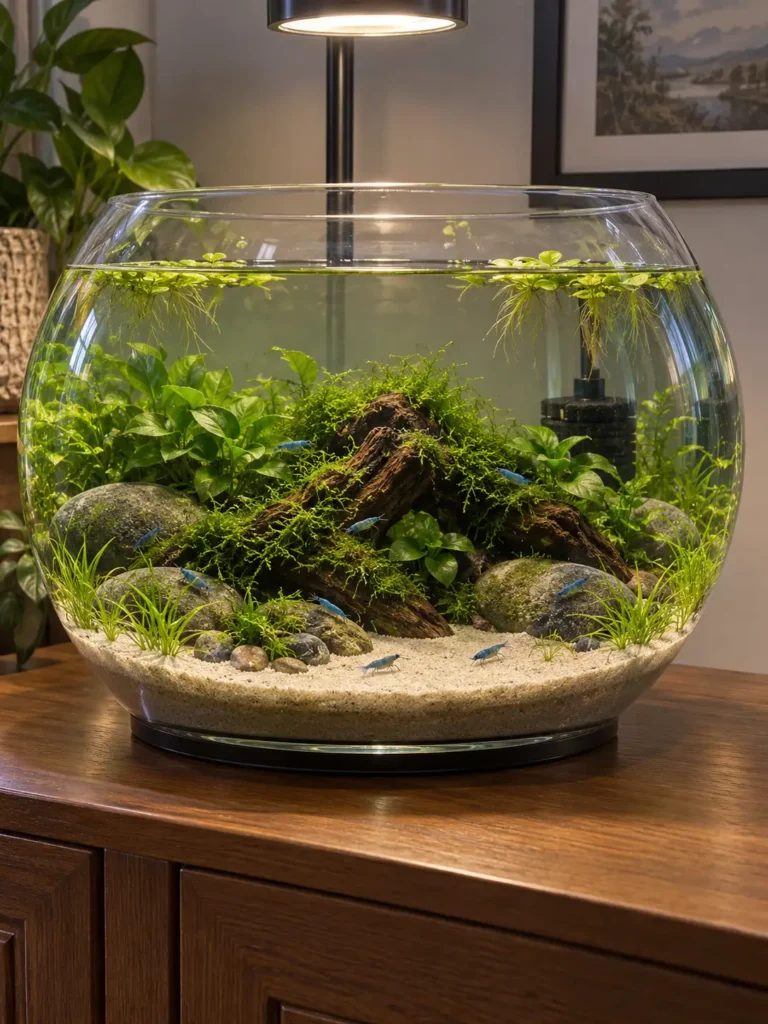
A wide bowl can become a planted shrimp aquarium if it holds enough water, has a stable base, and uses proper filtration.
The wide opening is better than the narrow surface found on traditional fishbowls. It improves gas exchange and makes maintenance easier.
How to recreate it
Select a wide, flat-bottomed bowl that holds about five gallons. Place it on a level cabinet that can carry the filled weight.
Spread fine natural sand across the bottom. Add a low piece of driftwood in the center and surround it with smooth river stones.
Attach Java moss to the wood. Plant dwarf sagittaria around the sides and use Anubias nana petite near the hardscape.
Hide a small sponge filter behind the plants without blocking its water flow. Leave an open patch of sand at the front for feeding.
Curved glass can make shrimp look larger or distorted from certain angles. That’s normal, not evidence that one shrimp has secretly become the tank boss.
The main drawback is cleaning. Standard algae scrapers don’t sit flat against curved glass, so use a soft aquarium sponge or flexible magnetic cleaner.
How to Set Up Any Small Shrimp Tank
The aquascape can change, but the safe setup process stays mostly the same.
Step 1: Test Your Tap Water
Test pH, GH, KH, ammonia, nitrite, and nitrate before buying shrimp.
Neocaridina are fairly adaptable, but they dislike sudden changes. Ask the seller what water parameters the shrimp are currently living in and choose shrimp raised in conditions close to yours.
Step 2: Rinse and Arrange the Hardscape
Rinse sand or gravel until the water runs reasonably clear. Aquarium soil usually shouldn’t be heavily rinsed, so follow the package directions.
Arrange rocks and driftwood before filling the tank. Push heavy stones down securely so burrowing snails or maintenance work can’t cause them to shift.
Step 3: Add Live Plants
Attach rhizome plants and moss to rocks or wood. Plant rooted species in the substrate.
Use plants from a shrimp-safe source when possible. Some plants may carry pesticide residue that can harm shrimp. Rinse them well and follow the seller’s instructions before adding them.
Step 4: Install Shrimp-Safe Filtration
A sponge filter is usually the easiest choice. It provides gentle flow and becomes another grazing surface.
If you use a hang-on-back or internal filter, cover its intake with a fine sponge.
Step 5: Fill and Condition the Water
Place a plate or plastic bag over the substrate and pour water onto it slowly. This prevents the layout from turning into an underwater sandstorm.
Treat tap water with an aquarium water conditioner that handles chlorine and chloramine.
Step 6: Cycle the Aquarium
Add an ammonia source and allow beneficial bacteria to become established. Test the water throughout the nitrogen cycle.
The tank is ready only when it can process ammonia without leaving measurable ammonia or nitrite. Nitrate will usually be present and can be lowered through water changes and plant growth.
Don’t use live shrimp to cycle a new aquarium.
Step 7: Let Biofilm Develop
A freshly cycled tank may still offer little natural food. Giving the aquarium extra time to mature allows biofilm and light algae to grow.
That slightly brown piece of wood may not win an aquascaping award, but your shrimp will treat it like a dinner table.
Step 8: Acclimate the Shrimp Slowly
Shrimp react badly to sudden differences in temperature and water chemistry. Drip acclimation gradually mixes aquarium water with the water in their transport container.
Once acclimated, transfer the shrimp with a net. Avoid pouring store water into the aquarium.
Common Small Shrimp Tank Problems
Shrimp Keep Dying After Water Changes
Large or sudden water changes can alter temperature, pH, hardness, and dissolved mineral levels.
Make smaller changes using conditioned water with a similar temperature. Don’t chase exact parameters by repeatedly adding chemicals. Stable, suitable water is safer than numbers that swing every weekend.
Shrimp Are Trying to Climb Out
Test ammonia and nitrite immediately. Shrimp may gather near the surface when water quality or oxygen levels are poor.
Check that the filter is running, increase surface movement, and complete an appropriate conditioned water change if testing shows a problem.
Shrimp Aren’t Moving Much
Some resting is normal, but widespread inactivity can point to unsuitable temperature, low oxygen, toxins, or poor water quality.
Check the tank before adding food or supplements. More products aren’t always the answer. Sometimes the best aquarium tool is the test kit gathering dust under the cabinet.
Algae Is Covering the Glass
A little algae is useful shrimp food. Heavy growth usually means the light stays on too long or the tank receives direct sunlight.
Reduce the lighting period, remove excess algae with a scraper, and avoid overfeeding. Don’t use random algae treatments because some may be unsafe for shrimp.
Which Shrimp Tank Idea Is Best for Beginners?
The low-tech planted tank, budget setup, and jungle layout are the safest starting choices. They use easy plants, gentle filters, and layouts that don’t demand constant trimming.
The moss breeding tank is best if you want a growing colony. The Dutch-style and carpeted rock layouts require more plant care.
The jar and bowl can work, but only when they hold enough water and include filtration. If this is your first shrimp aquarium, a standard 5 or 10-gallon rectangular tank will be easier to light, clean, filter, and stabilize.
Choose the layout you can maintain, not simply the one that looks best on setup day. A simple mature aquarium with stable water will keep shrimp far happier than an elaborate tank that’s constantly being rearranged.
